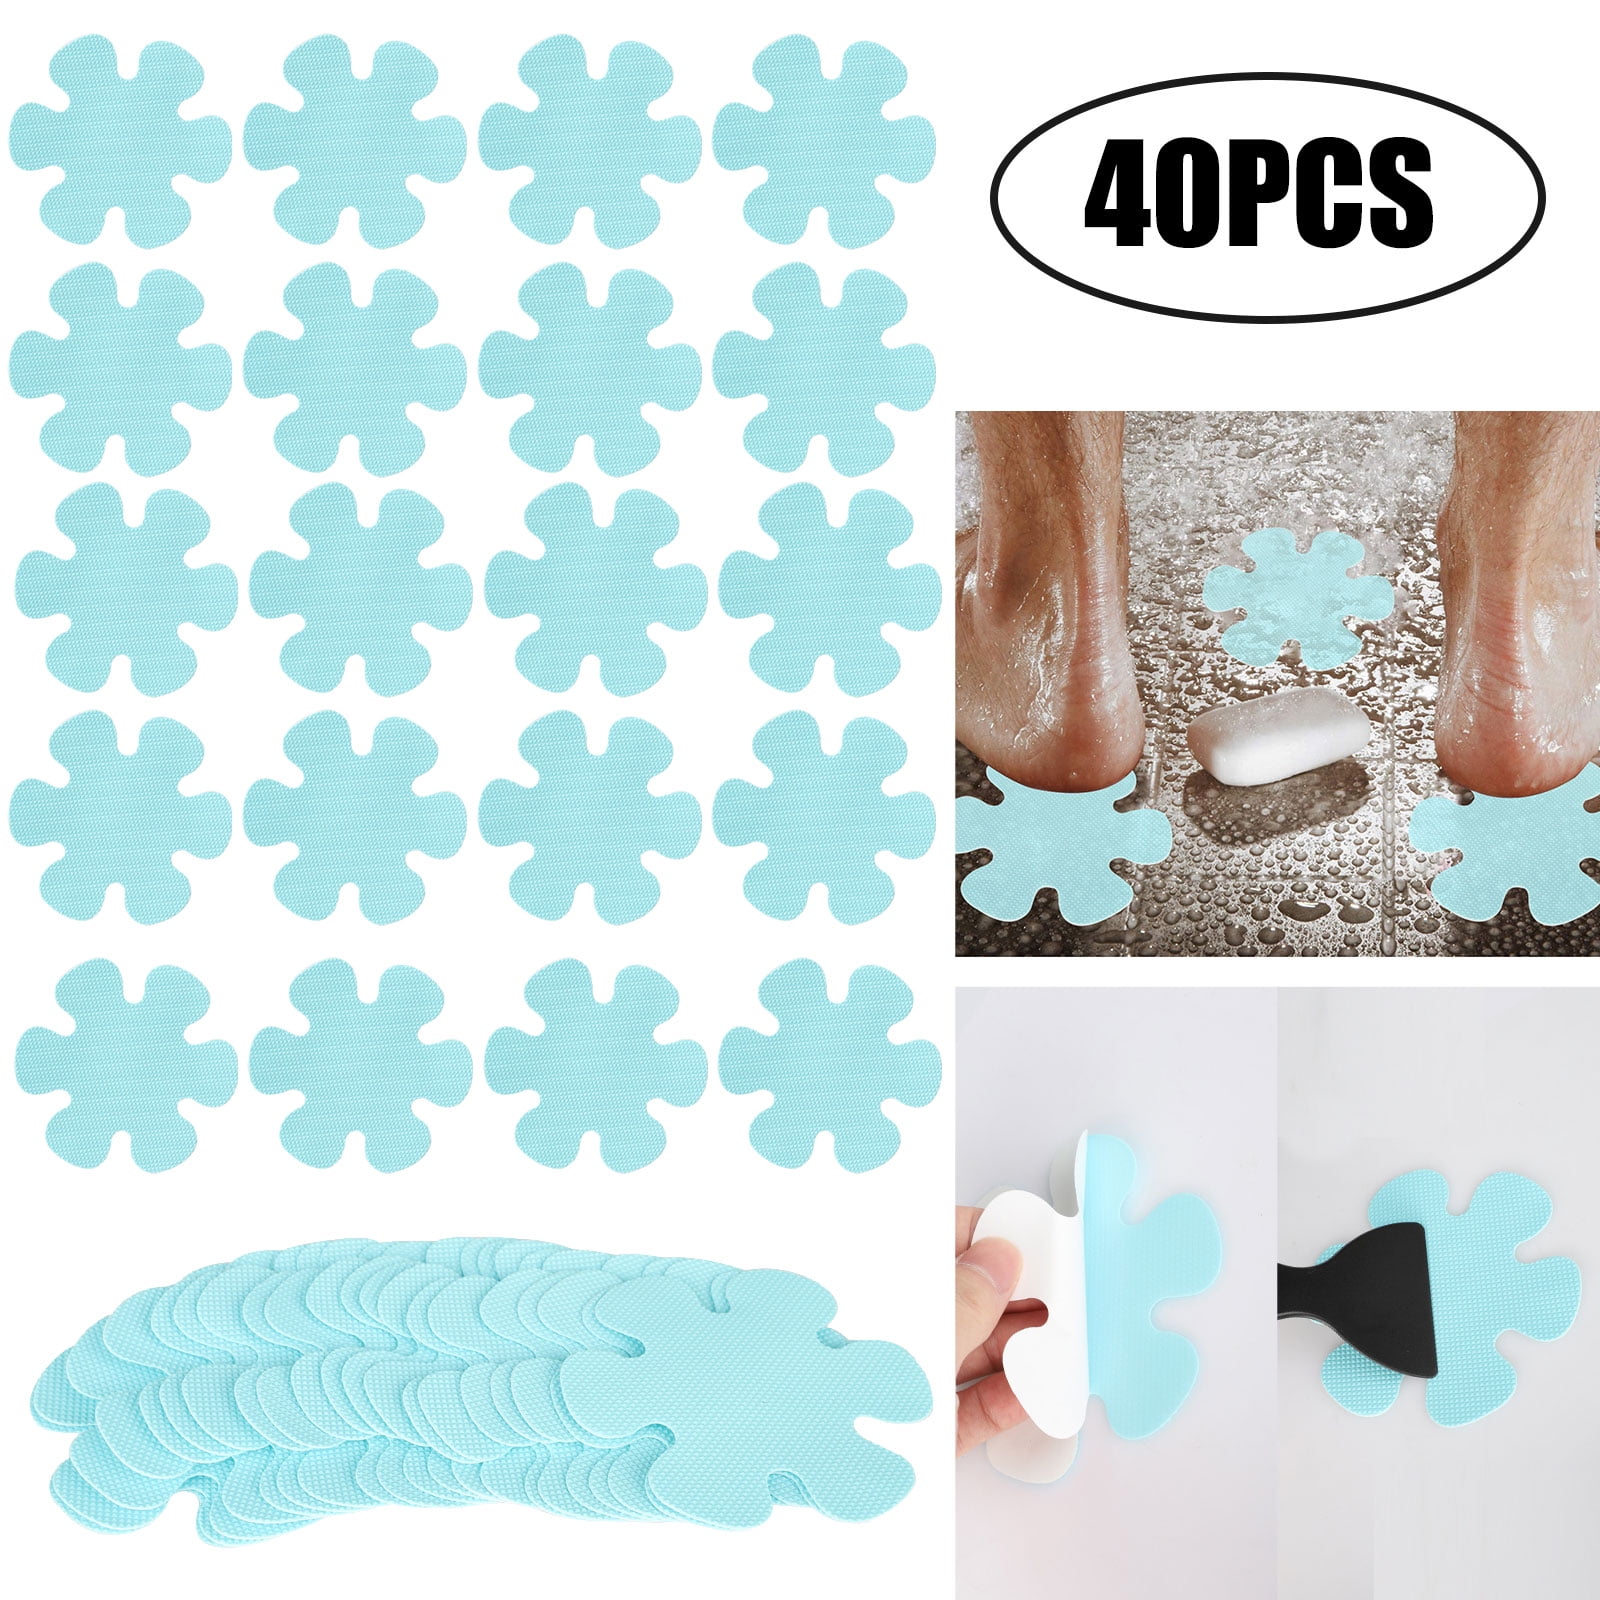
Types of Non-Slip Bathroom Floor Stickers

Non-slip bathroom floor stickers are a simple and effective way to enhance safety in your bathroom. These stickers come in a variety of materials, each with its own unique characteristics. Understanding the different types of materials and their properties can help you choose the best option for your needs.
Materials Used for Non-Slip Bathroom Floor Stickers
Non-slip bathroom floor stickers are typically made from one of the following materials:
- Vinyl: Vinyl is a popular choice for non-slip stickers due to its affordability, durability, and versatility. It is waterproof, easy to clean, and comes in a wide range of colors and designs. Vinyl stickers are also relatively easy to apply and remove, making them a good option for renters or those who want to change their decor frequently.
- Rubber: Rubber stickers offer excellent traction and are particularly effective in wet environments. They are also durable and long-lasting, making them a good choice for high-traffic areas. Rubber stickers are typically more expensive than vinyl stickers but offer superior grip and water resistance.
- Acrylic: Acrylic stickers are known for their clear and transparent appearance. They are also durable and resistant to fading, making them a good option for areas where aesthetics are important. Acrylic stickers are typically more expensive than vinyl stickers but offer a more elegant and subtle look.
- EVA foam: EVA foam stickers are soft, flexible, and comfortable underfoot. They are also waterproof and easy to clean. EVA foam stickers are a good option for areas where comfort is important, such as around bathtubs or showers.
Comparison of Non-Slip Sticker Materials
Here is a table comparing the pros and cons of different non-slip sticker materials:
| Material | Pros | Cons |
|---|---|---|
| Vinyl | Affordable, durable, versatile, easy to apply and remove | May not provide the strongest grip, can fade over time |
| Rubber | Excellent traction, durable, water-resistant | More expensive than vinyl, can be difficult to remove |
| Acrylic | Clear and transparent, durable, resistant to fading | More expensive than vinyl, may not provide as strong a grip as rubber |
| EVA foam | Soft, flexible, comfortable, waterproof, easy to clean | May not be as durable as other materials, can be more susceptible to wear and tear |
Examples of Non-Slip Stickers with Varying Designs and Patterns
Non-slip bathroom floor stickers come in a wide range of designs and patterns to complement any bathroom decor. Some popular examples include:
- Geometric patterns: Geometric patterns, such as squares, triangles, and circles, can add a modern and stylish touch to your bathroom.
- Floral designs: Floral designs can add a touch of elegance and femininity to your bathroom.
- Abstract patterns: Abstract patterns can add a unique and artistic touch to your bathroom.
- Solid colors: Solid colors, such as black, white, or gray, can provide a simple and classic look.
Installation and Maintenance of Non-Slip Stickers: Bathroom Floor Non Slip Stickers

Installing and maintaining non-slip bathroom floor stickers is crucial for maximizing their effectiveness and ensuring a safe bathroom environment. These stickers can prevent slips and falls, particularly on wet surfaces, but their effectiveness depends on proper installation and ongoing maintenance.
Installation of Non-Slip Stickers
Before installing non-slip stickers, ensure the bathroom floor is clean and dry. Remove any dirt, debris, or residue that may interfere with the adhesion of the stickers.
- Prepare the Surface: Clean the bathroom floor thoroughly with a mild detergent and water. Allow the floor to dry completely before proceeding.
- Choose the Location: Identify areas prone to slipping, such as the shower floor, bathtub rim, or areas near the sink.
- Peel and Stick: Remove the backing from the non-slip sticker and carefully apply it to the chosen location.
- Press Firmly: Press down firmly on the sticker for several seconds to ensure a secure bond.
- Repeat for Additional Stickers: Repeat steps 3 and 4 for any additional stickers you wish to install.
Maintenance of Non-Slip Stickers, Bathroom floor non slip stickers
Regular cleaning is essential to maintain the effectiveness of non-slip stickers. Dirt, grime, and soap residue can accumulate on the sticker’s surface, reducing its grip.
- Regular Cleaning: Clean the non-slip stickers with a mild detergent and water. Avoid using abrasive cleaners or harsh chemicals that could damage the stickers.
- Avoid Abrasive Cleaners: Harsh chemicals or abrasive cleaners can damage the adhesive and reduce the sticker’s effectiveness.
- Rinse Thoroughly: After cleaning, rinse the stickers thoroughly with water to remove any detergent residue.
- Allow to Dry: Allow the stickers to dry completely before using the bathroom floor.
Removal of Non-Slip Stickers
When non-slip stickers become worn out or need to be replaced, it’s important to remove them properly to avoid damaging the bathroom floor.
- Soak in Warm Water: Soak the stickers in warm water for several minutes to loosen the adhesive.
- Use a Plastic Scraper: Gently scrape the stickers off the floor using a plastic scraper. Avoid using metal tools that could scratch the floor.
- Remove Residual Adhesive: If any adhesive residue remains, use a mild adhesive remover to remove it.
- Clean the Floor: Clean the floor thoroughly to remove any remaining adhesive residue.
Step-by-Step Guide for Applying Non-Slip Stickers on Various Bathroom Surfaces
The application process may vary slightly depending on the type of bathroom surface. Here’s a step-by-step guide for applying non-slip stickers on common bathroom surfaces:
Applying Non-Slip Stickers on Tile Floors
- Clean the Tile: Clean the tile floor thoroughly with a mild detergent and water. Allow the floor to dry completely.
- Choose the Location: Identify areas prone to slipping, such as the shower floor or areas near the bathtub.
- Peel and Stick: Remove the backing from the non-slip sticker and carefully apply it to the chosen location on the tile.
- Press Firmly: Press down firmly on the sticker for several seconds to ensure a secure bond.
- Repeat for Additional Stickers: Repeat steps 3 and 4 for any additional stickers you wish to install.
Applying Non-Slip Stickers on Bathtub Surfaces
- Clean the Bathtub: Clean the bathtub thoroughly with a mild detergent and water. Allow the bathtub to dry completely.
- Choose the Location: Identify areas prone to slipping, such as the bathtub rim or the bottom of the bathtub.
- Peel and Stick: Remove the backing from the non-slip sticker and carefully apply it to the chosen location on the bathtub surface.
- Press Firmly: Press down firmly on the sticker for several seconds to ensure a secure bond.
- Repeat for Additional Stickers: Repeat steps 3 and 4 for any additional stickers you wish to install.
Applying Non-Slip Stickers on Shower Floors
- Clean the Shower Floor: Clean the shower floor thoroughly with a mild detergent and water. Allow the floor to dry completely.
- Choose the Location: Identify areas prone to slipping, such as the shower floor or the area near the shower drain.
- Peel and Stick: Remove the backing from the non-slip sticker and carefully apply it to the chosen location on the shower floor.
- Press Firmly: Press down firmly on the sticker for several seconds to ensure a secure bond.
- Repeat for Additional Stickers: Repeat steps 3 and 4 for any additional stickers you wish to install.
